Creating your first AI agent

- Find the “Ask AI” button in your project - this will be your entry point to AI agents
- Create a new agent (only admins and developers can create new AI agents)
-
Configure your agent:
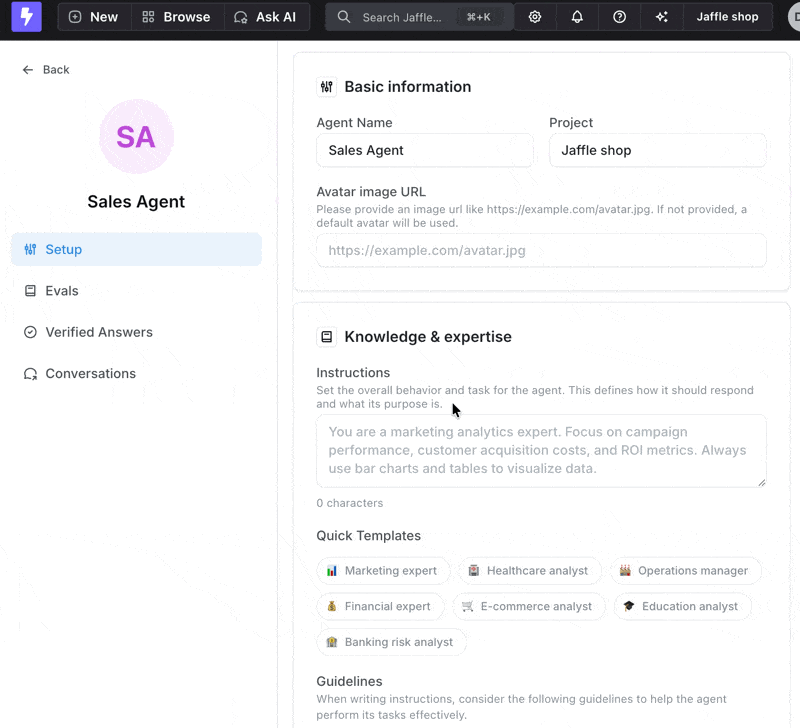
- Name and image - Give your agent a memorable name and visual identity
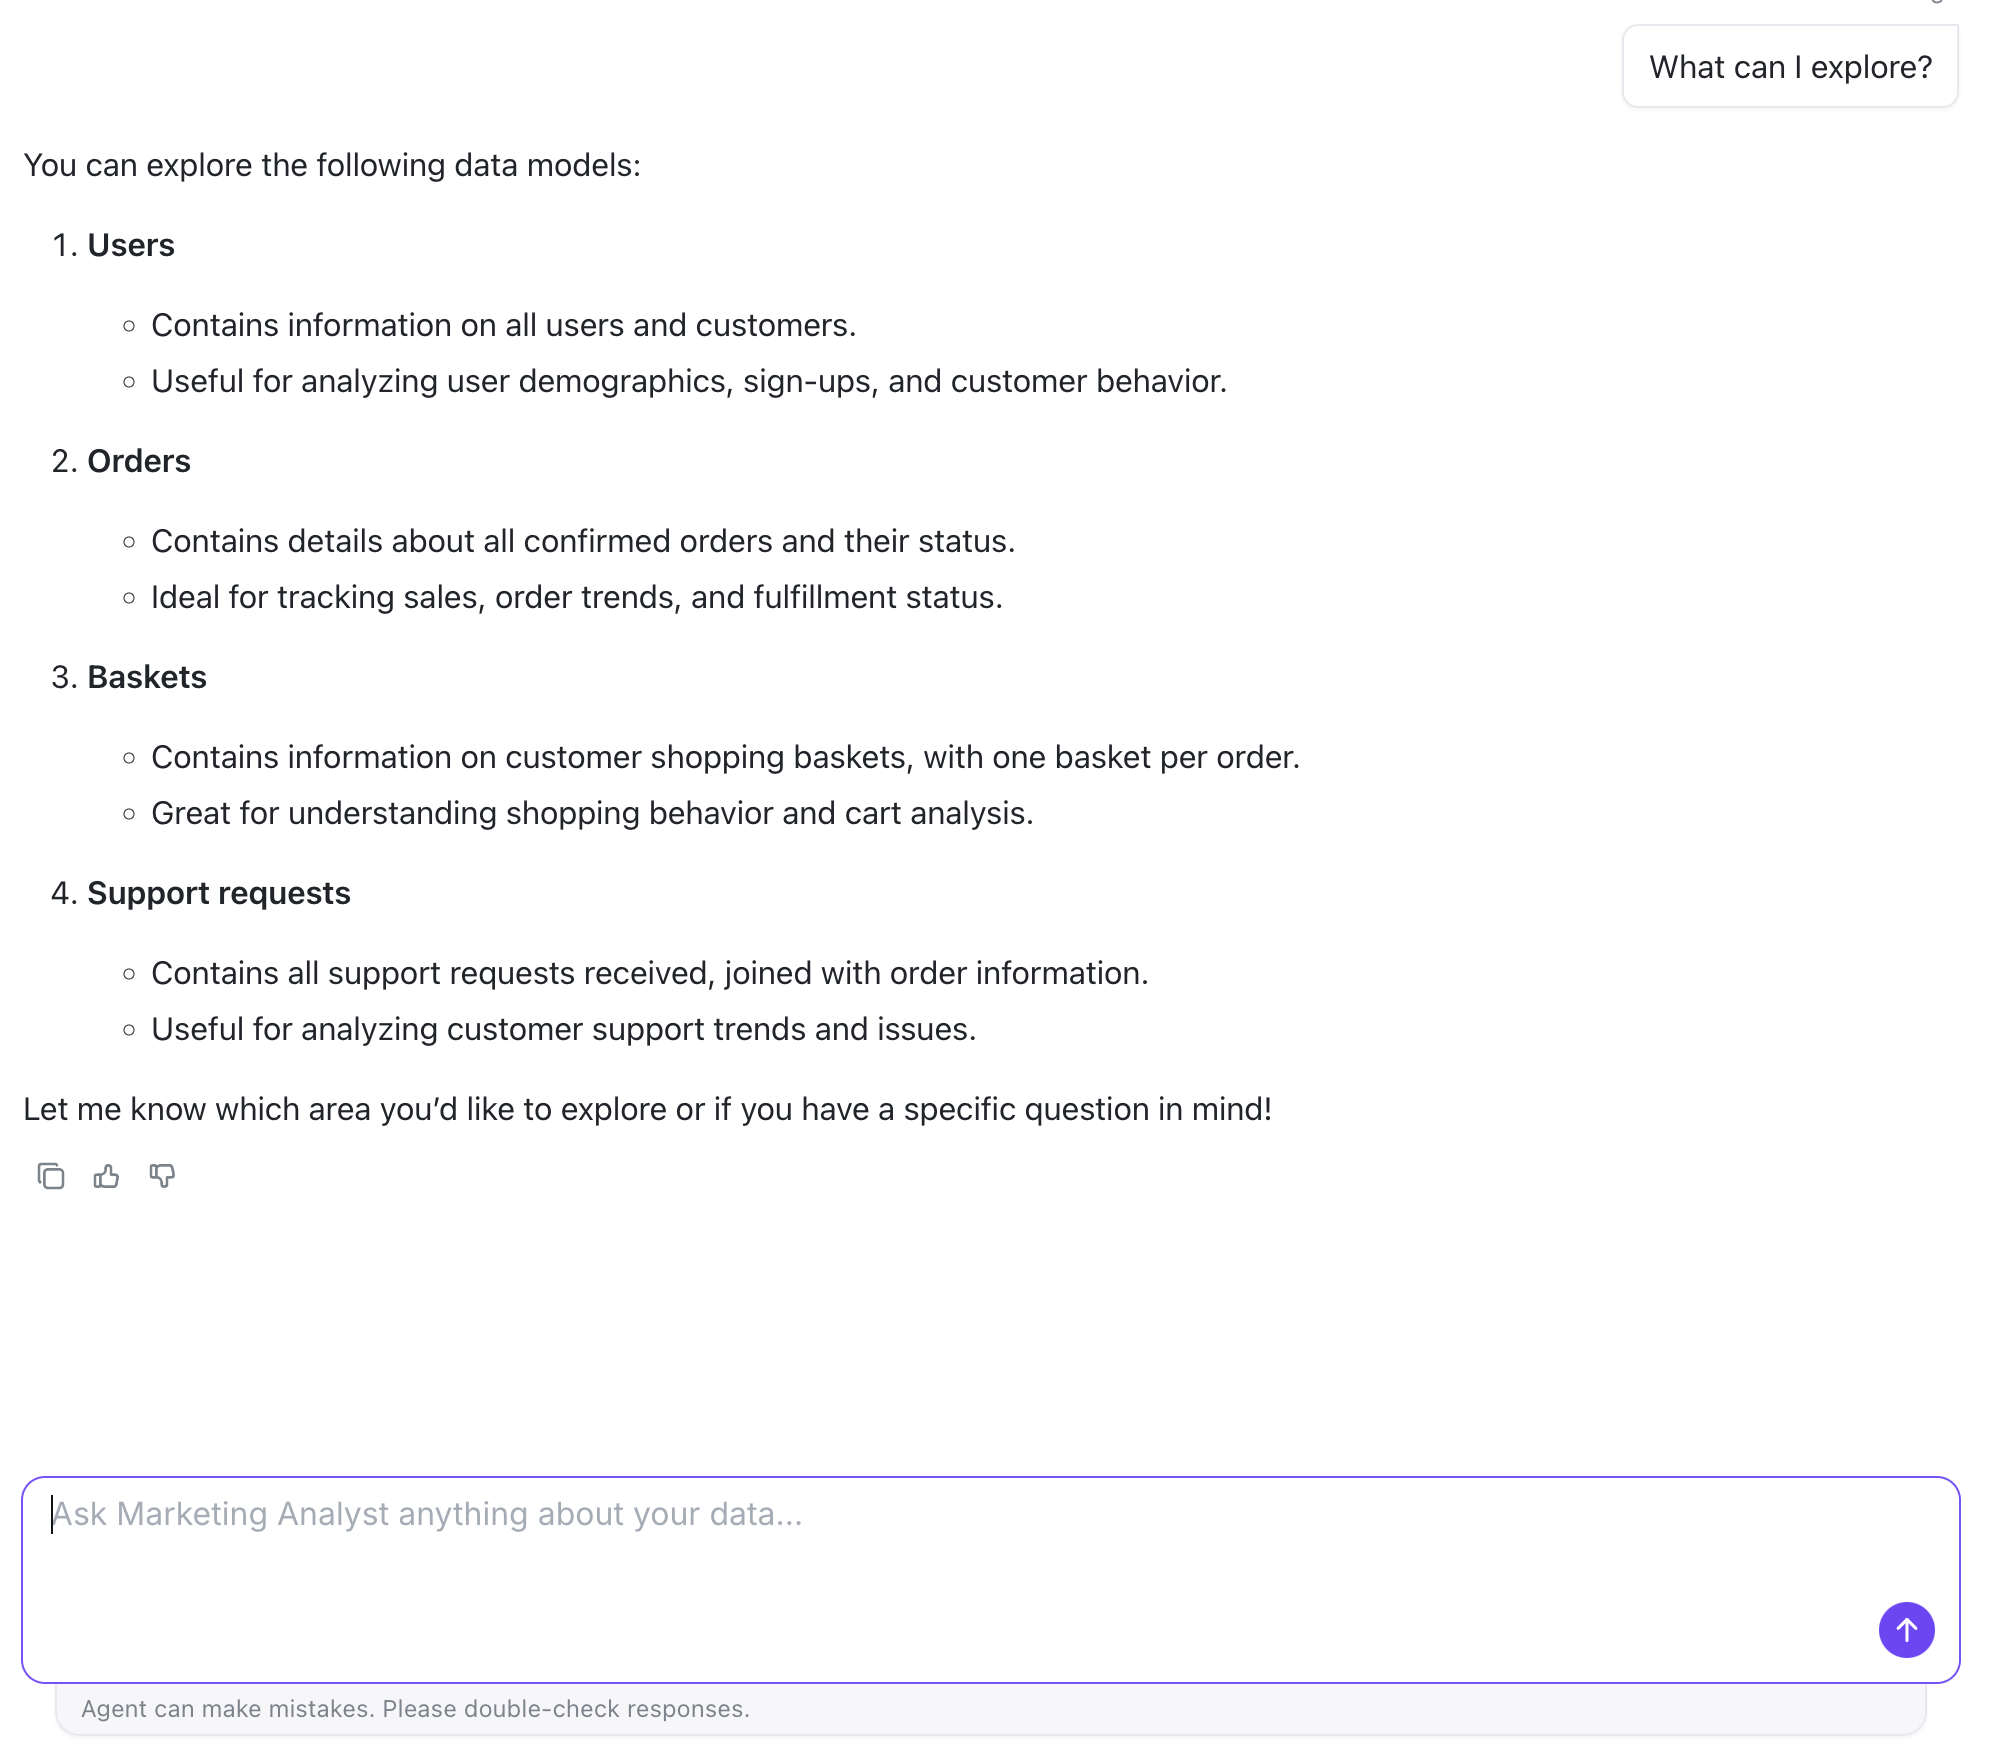
- Instructions (optional) - Provide context about your models, tables, or specific use cases to help the AI give more relevant responses. Some templates are provided to get you started.
- Enable Data Access (optional) - Enable data access to allow your agent to analyze actual query results and provide insights based on the data. When disabled, agents work with metadata only
- Enable Self-Improvement (optional, Beta) - Allow your agent to propose changes to your semantic layer, including updating descriptions and creating new metrics. Changes are tracked in changesets for review
- User and Group Access (optional) - Control which users and groups can access your agent through the agent settings
- Tags (optional) - Use dbt tags to control which metrics and dimensions the agent can access
- Slack Integration (optional) - Connect your agent to Slack channels so users can interact directly from Slack
Setting up multiple agents
You can create multiple AI agents, each configured for different tasks, tones, languages, or teams. Each agent can have access to different datasets to focus results and give more accurate answers.Limiting access to specific explores and fields
You can control which explores and fields your AI agent can access using tags from your dbt models. When you configure tags in your agent settings, the agent will only see explores and fields that have matching tags. How tag matching works:- Add one or more tags to your agent settings
- Fields or explores with any of those tags will be accessible to the agent
- If no tags are configured, the agent can access everything
- As you add tags, you can interactively explore which explores and fields will be available in the agent settings interface
Preview available explores and fields as you add tags
- Explore-level tags - Tag the model to control access to entire explores
- Field-level tags - Tag individual metrics and dimensions for granular control
How filtering works
The filtering behavior depends on how you’ve tagged your models: Explore visibility:- An explore is only visible if its base table has matching tags at either:
- Explore level (model tags match agent tags), OR
- Field level (at least one base table field has matching tags)
- If only joined tables have matching tags but the base table doesn’t, the explore will be hidden
-
Field-level mode (when ANY field in the table has tags defined):
- Only fields with matching tags are visible
- Other fields are hidden, even if the explore is tagged
- Note: An empty tags array (
tags: []) activates field-level mode but matches nothing
-
Explore-level mode (when NO fields in the table have tags):
- If explore tags match: ALL fields in the table are visible
- If explore tags don’t match: NO fields are visible
Adding tags at the model level
Tag entire models to give your AI agent access to all metrics and dimensions within that explore:Adding tags to individual metrics & dimensions
For more granular control, tag specific metrics and dimensions:Common scenarios
Here are some common tagging scenarios and their results: Scenario 1: Explore-level only (no field tags)["ai-enabled"] tag, ALL fields in the customers explore are visible.
Scenario 2: Field-level only (no explore tags)
["ai-enabled"] tag, only customer_name is visible. The email field is hidden.
Scenario 3: Mixed - explore tagged with fields that have different tags
["ai-enabled"] tag, NO fields are visible. Field-level mode is active (because fields have tags), and none of the field tags match “ai-enabled”.
Scenario 4: Mixed mode - base model with explore tags, joined model with field tags
- orders.yml (base model)
- customers.yml (joined model)
["ai-enabled"] tag:
orderstable: ALL fields visible (explore-level mode - no field tags defined)customerstable: Onlyemailvisible (field-level mode - has field tags, onlyemailmatches)
- orders.yml (base model)
- customers.yml (joined model)
orders) has no matching tags.